
Table of Contents
- Why Catering Trailer Axle Health Matters for Your Business
- What You'll Need for Axle Maintenance
- Step 1: Perform Routine Visual Inspections
- Step 2: Follow a Trailer Wheel Bearing Maintenance Schedule
- Step 3: How to Grease Trailer Axles Properly
- Step 4: Watch for Signs of Trailer Axle Failure
- Catering-Specific Axle Risks: Weight Distribution and Sanitation Damage
- When to DIY vs. Call a Professional
- Frequently Asked Questions
Last Updated: September 15, 2026
Why Catering Trailer Axle Health Matters for Your Business
A failed axle doesn't announce itself politely. It seizes on the highway, chews through a tire at 60 mph, or drops your trailer mid-event with 200 guests waiting on brisket. For anyone maintaining catering trailer axle health, the stakes are simple: your axle is the only thing between a profitable weekend and a ruined reputation.

At Blowin' Smoke Cookers, we provide heavy-duty catering trailers. Neglected running gear can quickly turn a working asset into a liability, and many owners focus on the smoker while overlooking the suspension underneath.
This guide covers our recommended maintenance routine, from visual inspections to bearing repacking, plus the two risks that hit catering trailers hardest: uneven weight distribution and sanitation-related axle damage.
What You'll Need for Axle Maintenance
Basic trailer axle maintenance requires fewer specialty items than most people expect. Gather these before you crawl under the trailer.
- Floor jack rated above your loaded tongue weight, plus two jack stands
- Torque wrench for lug nuts and shackle bolts
- Grease gun with a compatible cartridge
- New grease seals and wheel bearings (spares, not optional)
- Flashlight or work light
- Tire pressure gauge
- Wire brush and rags
- A maintenance log, paper or digital
Step 1: Perform Routine Visual Inspections
The fastest way to catch axle problems early is a five-minute walk-around before every tow: a systematic check of the axle tube, suspension, and running gear for damage, leaks, or wear.
Work through this checklist in order:
- Look for grease streaks on the inside of the wheels, which signal a leaking grease seal.
- Check the axle tube for bends, cracks, or fresh rust.
- Inspect shackle bolts, leaf springs, and axle hangers for looseness or missing hardware.
- Confirm lug nuts are present and tight.
- Scan the undercarriage for dangling wires or bent brackets.
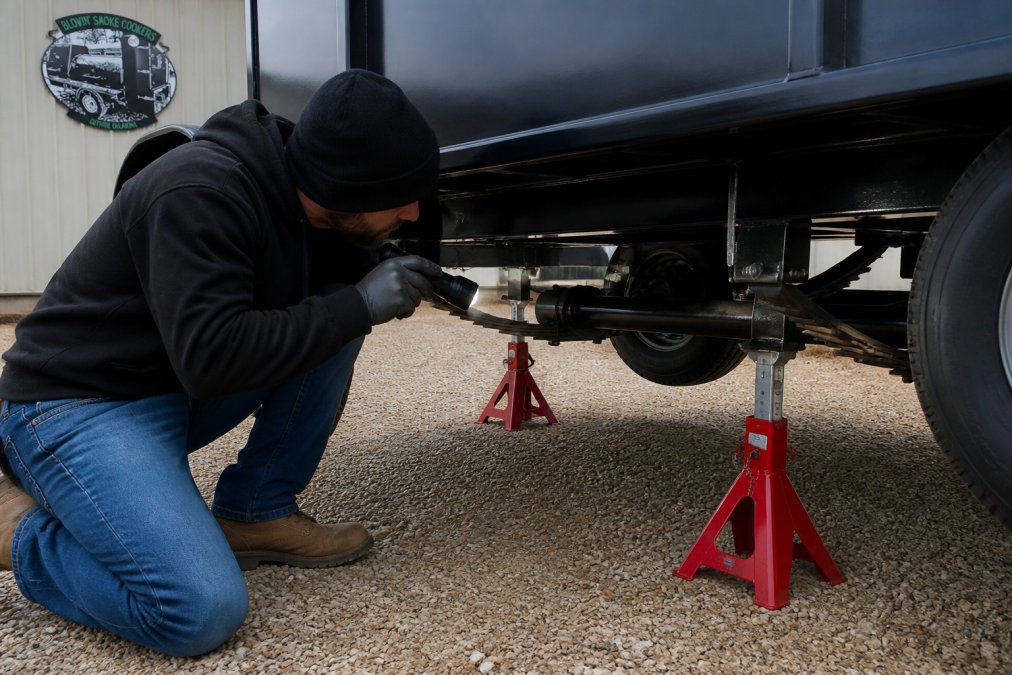
Do this before every trip, not once a season. Damage rarely appears all at once.
Step 2: Follow a Trailer Wheel Bearing Maintenance Schedule
A trailer wheel bearing maintenance schedule is the backbone of axle longevity. Bearings carry the load and spin thousands of revolutions per mile, so they need clean grease and intact seals.
The general rule: inspect bearings annually and repack or replace them based on mileage, water exposure, and how often the trailer sits idle.
How Often to Repack Wheel Bearings
Most manufacturers recommend repacking every 12,000 miles or once a year, whichever comes first (nhtsa.gov). Trailers that sit for long periods or get backed into water need attention sooner, because moisture degrades grease even without mileage.
If you tow frequently through rain or launch near boat ramps, shorten that interval. A bearing that runs dry will fail without warning.
Trailer Use Pattern |
Repack Interval |
Priority Check |
|---|---|---|
Light seasonal towing |
Every 12 months |
Seal condition |
Regular catering routes |
Every 12,000 miles |
Grease color |
Frequent rain or water exposure |
Every 6 months |
Moisture ingress |
Long-term storage |
Before first tow of season |
Rust and pitting |
Step 3: How to Grease Trailer Axles Properly
Knowing how to grease trailer axles correctly prevents the two killers of bearings: under-greasing and contamination. Fill the hub with clean grease while keeping dirt and water out. This is where most catering trailer owners cut corners, and it determines whether your bearings last 12,000 miles or 3,000.
The Full Repack Procedure
- Raise the trailer on jack stands rated for the loaded weight so the wheel spins freely. Never work under a trailer held only by a jack.
- Remove the hub cap, cotter pin, and spindle nut. Keep the hardware in a labeled container, mixing parts between hubs is a common reassembly mistake.
- Pull the hub assembly straight off the spindle. If it resists, check that the brake shoes are not hung up on the drum before forcing it.
- Wipe old grease from the hub cavity and spindle. Inspect the spindle for scoring, galling, or a blue heat tint, any of these means the spindle needs professional attention, not just new bearings.
- Clean the bearings in solvent and dry them with compressed air or lint-free rags. Never spin a dry bearing with compressed air; the rollers can skid and score the races (osha.gov).
- Inspect each bearing for pitting, discoloration, roughness, or a worn cage. If the races show any of these, replace bearing and race as a matched set, never mix new with used.
- Pack new grease into the bearing races by hand or with a bearing packer. Work grease through the rollers from the large end until it pushes out the small end.
- Install new grease seals. Match the seal to the spindle and hub bore, a seal that is even slightly undersized will weep grease onto the brake shoes.
- Reassemble the hub, then torque the spindle nut to the manufacturer's spec. Defer to the axle manufacturer's published torque value when you have it.
- Install a new cotter pin. Never reuse a cotter pin, and never substitute a nail or wire.
Choosing the Right Grease and Avoiding Contamination
Use a high-quality lithium-complex or marine-grade grease rated for wheel bearings. Mixing types, say, topping off a lithium-complex hub with calcium-based grease, can break down the blend and lose film strength. Stick with one product and log the brand and type so the next repack uses the same base.
Grease contamination is the quiet failure. A torn seal lets water and grit in, and the bearing wears from the inside out: water emulsifies the grease, the emulsion loses load-carrying ability, and the rollers skid instead of roll. By the time you hear the hum, the damage is done. Whenever you repack, replace the seals, they cost little and prevent expensive bearing failure.
Why Catering Trailers Need Shorter Intervals
A catering trailer is not a boat trailer or a cargo trailer. It sits loaded with heavy kitchen equipment, gets washed down often, and sits idle between events, load, moisture, and idle time are exactly what degrades grease. If it sits for weeks between bookings, moisture condenses inside the hub as temperatures swing and the grease can separate. Repack before the first tow of the season even if you didn't hit the mileage interval.
Step 4: Watch for Signs of Trailer Axle Failure
Catching the signs of trailer axle failure early saves you from a roadside breakdown. The warnings are usually audible, visible, or felt through the tow vehicle.
Watch for these red flags:
- A humming or grinding noise that changes with speed
- Vibration through the trailer or tow vehicle
- Grease leaking around the wheel or hub
- Uneven or rapid tire wear
- A visibly bent axle or sagging suspension
If you notice any of these, stop towing and inspect before your next trip.
Tire Wear Patterns and What They Tell You
Tire wear patterns are a diagnostic tool. Cupping or scalloped edges point to worn bearings or suspension.
Catering-Specific Axle Risks: Weight Distribution and Sanitation Damage
Catering-Specific Weight Distribution
A few practical rules:
Sanitation-Related Axle Damage
What to do about it:
Seasonal Storage: The Third Catering-Specific Risk
When to DIY vs. Call a Professional
Call a professional when you hit these thresholds:
Frequently Asked Questions
What is the 60/40 rule for trailer axles?
The 60/40 rule refers to weight distribution: 60% of the trailer's total loaded weight should sit in front of the axle, and 40% behind it. For a catering trailer, this means placing heavier equipment like smokers and generators toward the front. Proper distribution reduces tongue weight strain on your hitch and prevents the rear axle from bearing excess load, which extends axle life and improves towing stability.
How often do trailer axles need to be greased?
Always follow the axle manufacturer's recommendation, since sealed and EZ-lube axles have different intervals.
What are the signs of a failing trailer axle?
Common warning signs include uneven tire wear, a wobbling or vibrating trailer at speed, grease leaking from the hub, a burning smell near the wheels, and visible bends or cracks in the axle tube. You may also notice metal shavings in the grease or hear grinding noises. Catching these early prevents a roadside breakdown during a catering event, which can cost you the job and your reputation.
Can I grease trailer axles myself or should I hire a professional?
Basic greasing and visual inspections are manageable for most catering trailer owners using a grease gun and the right fittings. However, repacking wheel bearings, replacing grease seals, and checking axle alignment require specialized tools and experience. If you notice bent axles, excessive play in the hub, or repeated bearing failures, hire a qualified trailer mechanic. The cost of professional service is far less than replacing a failed axle mid-season.