
Table of Contents
- Why Smoker Trailer Axles Need Regular Maintenance
- What You'll Need Before You Start
- Trailer Wheel Bearing Maintenance Schedule
- How to Inspect Trailer Leaf Springs
- Signs of a Bent Trailer Axle
- Seasonal Maintenance Checklist for Smoker Trailer Axles
- Common Mistakes to Avoid
- Conclusion
- Frequently Asked Questions
Last Updated: September 12, 2026
Why Smoker Trailer Axles Need Regular Maintenance
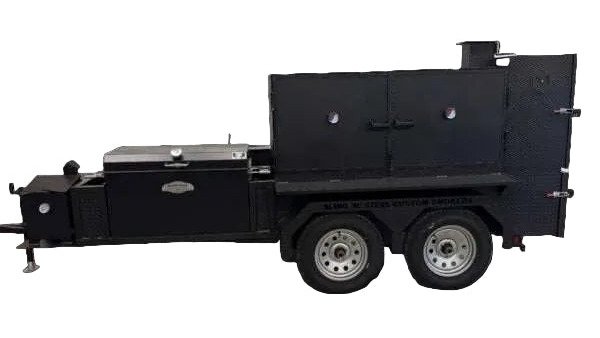
Maintaining custom BBQ smoker trailer axles is the difference between a rig that rolls into every event and one that sits on the shoulder with a seized bearing. At Blowin' Smoke Cookers, we've seen how quickly neglect catches up: a loaded smoker trailer carries far more tongue weight and rolling load than a utility trailer of the same size, and every mile works the bearings, springs, and spindles harder. Axle care protects your investment and keeps your catering schedule intact.
The stakes are simple. A failed wheel bearing can seize a hub at highway speed, and a cracked leaf spring can drop a loaded trailer onto its own tire. Most failures announce themselves weeks in advance through grease weeping past a seal, a tire wearing on one edge, or a subtle lean in the frame, but owners rarely look until something breaks.
This guide covers the full maintenance routine for smoker trailer axles: bearing service, leaf spring inspection, alignment checks, and the seasonal schedule that ties it together, what to check, how often, and what the warning signs mean.
What You'll Need Before You Start
Gather your tools and supplies first so the trailer isn't sitting on jack stands while you hunt for a missing socket.
- Floor jack and rated jack stands (never work under a trailer held only by a jack)
- Torque wrench and a lug wrench that matches your wheel lug pattern
- Bearing grease, new grease seals, and shop rags
- Brake cleaner and a stiff brush
- Flashlight or work light
- Gloves and safety glasses
Two more items earn their place: a small pry bar for checking spring and shackle play, and a tape measure for alignment checks. If your trailer runs electric brakes, keep a test light handy.
Trailer Wheel Bearing Maintenance Schedule
Trailer wheel bearing maintenance should happen at least once a year, and more often if you tow frequently. For a catering trailer that runs events most weekends, repack bearings every 10,000 to 12,000 miles or annually, whichever comes first (dexteraxle.com). A trailer that sits for months still needs an annual inspection, because grease can separate and seals can dry out without mileage.

Why Bearings Fail Before They Seize
Bearings are the most common cause of trailer breakdowns on the road, and heat is the enemy. The failure chain is predictable:
- Grease breaks down. Heat, age, and moisture cause the base oil to separate from the thickener. The grease stops flowing to the rollers.
- Metal-to-metal contact begins. Without a lubricating film, rollers and races scuff. This generates more heat, which cooks the remaining grease faster.
- The seal fails. Heat hardens the seal lip, and grease weeps past it. That weeping streak on the inside of your wheel is the first visible warning.
- The race pits and spalls. Once the hardened surface layer flakes, the bearing grinds instead of rolls. At this point it is minutes from seizing, not miles.
Grease Selection and Compatibility
Not all bearing grease is the same, and mixing incompatible types causes premature failure. Two families dominate trailer service:
- Lithium complex, the most common general-purpose trailer grease. Good heat resistance, good water resistance, widely available.
- Calcium sulfonate, better water resistance and shear stability, often specified for marine and frequently-washed trailers.
A lithium complex NLGI #2 grease handles the typical smoker trailer duty cycle well. If you switch grease types, clean the bearing and hub completely first, mixing lithium with calcium-based grease can soften the mixture and cause it to run out of the bearing.
How to Repack Bearings Step by Step
- Chock the opposite wheels, lift the trailer by the frame, and secure it on jack stands.
- Remove the wheel and pull the hub assembly, catching the outer bearing as it comes free.
- Pry out the grease seal and remove the inner bearing. Discard the old seal; never reuse one.
- Clean both bearings and the hub cavity with brake cleaner, then inspect the rollers and races for pitting, scoring, or blue discoloration.
- Pack fresh grease into the bearing cages by hand until it pushes out the far side.
- Coat the hub cavity with a thin layer of grease, then seat the inner bearing and tap in a new grease seal.
- Slide the hub onto the spindle, fit the outer bearing, washer, and nut, then torque the nut to spec while spinning the hub.
- Install the cotter pin, recheck end play, and repeat on the remaining wheels.
Expected result: The hub should spin smoothly with slight resistance and no wobble. If it grinds or has noticeable play, stop and recheck the bearing seating before you tow.
Reading Bearing Wear: What the Parts Tell You
Before you clean and repack, look at what came out. The wear pattern is a diagnostic tool:
- Even, light gray sheen on rollers and races, normal service wear. Clean, repack, reuse.
- Blue or purple discoloration, the bearing overheated. Replace the bearing and race, and check the spindle for scoring.
- Pitting or spalling (flaking metal), the bearing is finished. Replace it. Do not repack a pitted bearing.
- Rust or reddish-brown staining, moisture intrusion. Replace the seal, inspect the spindle, and consider a water-resistant grease.
- One worn roller or a single flat spot, the bearing was run with too little preload or sat under load for a long period. Replace it.
Spindle and Seal Inspection
While the hub is off, inspect the spindle for scoring, galling, or a groove worn where the seal rides. A light polish with fine emery cloth can clean minor surface rust, but a deeply scored spindle needs replacement. Check the hub's seal surface for nicks that would let grease escape, a new seal on a damaged surface will leak from day one.
Setting Bearing Preload Correctly
End play, not torque, is what you are setting. Tighten the spindle nut while spinning the hub until it seats the bearing, then back off to the next castellation or the specified end play. Most trailer spindles call for a small amount of end play, enough to feel a slight rock when you grab the tire at top and bottom (dexteraxle.com). Zero end play or preload will overheat the bearing; too much lets the hub walk and pound the seal. Follow the axle manufacturer's spec; if you don't have it, err toward slight end play.
Sealed vs. Greasable Hubs
Some custom smoker trailers use sealed, non-serviceable hubs, common on lighter axles and replaced as a unit when they fail. Inspect sealed hubs for play and heat at every pre-tow check, and replace the assembly when you detect roughness or weeping. Greasable hubs with a zerk fitting can be serviced with a grease gun, but over-greasing can push grease past the rear seal and contaminate the brakes. Pump slowly and stop when you see fresh grease at the front, not when the gun feels tight.
A Note on Long-Distance Catering
A trailer that runs long highway miles at sustained speed builds more bearing heat than one making short local trips. If your catering schedule includes multi-state runs, shorten the repack interval and check hub temperature by hand at every fuel stop, a hub too hot to touch needs attention before the next leg.
How to Inspect Trailer Leaf Springs
Leaf springs support the entire load of your smoker, so inspect them at every oil change and before any long tow (nhtsa.gov). Look for cracks, a flattened or reversed arch, and rust eating into the leaf edges. A spring that has lost its arch lets the trailer sit lower on one side, shifting load onto the opposite axle and accelerating tire wear.
Checking Shackles, U-Bolts, and Equalizers
Shackles, U-bolts, and equalizers connect the springs to the frame and loosen over time. With the trailer on the ground, rock each shackle; any clunk or visible gap means a worn bushing or loose bolt. Check U-bolt torque, since stretched U-bolts let the axle shift under load. On tandem-axle trailers, a seized equalizer forces one axle to carry more than its share, so grease the pivot at every service.
Signs of a Bent Trailer Axle
A bent trailer axle shows up as uneven tire wear, dog-tracking, or one tire running hotter than the others. The most reliable sign is camber: stand behind the trailer and sight along each tire, a wheel leaning in at the top or out at the bottom points to a bent tube. Hitting a curb or deep pothole with a loaded smoker is the usual cause.
How to Check Axle Alignment
Measure from a fixed point on the frame to the center of each spindle on both sides. The two measurements should match within a small tolerance; a difference means the axle has shifted or the spring center bolt has sheared. You can also run a string line along the trailer's centerline and compare it to each hub. If an axle is out of alignment, don't guess at a fix. A bent tube needs straightening or replacement by a shop with the right equipment, and a shifted axle needs its U-bolts and center bolts reset to spec.
Seasonal Maintenance Checklist for Smoker Trailer Axles
Run this checklist at the start of every season and again before any long catering run. It takes an afternoon and prevents the failures that end events early.
Task |
Frequency |
Why It Matters |
|---|---|---|
Repack wheel bearings |
Annually or every 10,000-12,000 miles |
Prevents seized hubs and roadside failures |
Inspect leaf springs and shackles |
Every oil change and before long tows |
Catches cracks before a spring fails under load |
Check axle alignment |
Once a season and after any impact |
Stops uneven tire wear and dog-tracking |
Inspect tires for wear and pressure |
Before every tow |
Reveals alignment and load problems early |
Check safety chains and lighting |
Before every tow |
Keeps the rig road-legal and visible |
Grease equalizer pivots and check U-bolt torque |
Once a season |
Keeps load shared evenly across axles |
The safety chain and lighting checks belong on this list for a reason. A trailer that loses a chain or brake light fails a roadside inspection, and a citation is the least of your problems if the trailer separates at speed. Check chain links for cracks, confirm both chains cross under the tongue, and test every light before you pull out.
Common Mistakes to Avoid
The most common mistake is treating bearings as a one-time job. Owners repack once, then tow for years while the grease quietly breaks down. Annual service exists because grease degrades on a calendar, not just on mileage.
A second mistake is over-tightening the spindle nut to stop a wheel from wobbling. That preloads the bearing, generates heat, and destroys it within a few hundred miles. The nut should be snugged to spec with the hub spinning, never cranked down.
Third, owners ignore a trailer that sits. A smoker trailer stored for the off-season still needs its bearings checked before the first spring event, because condensation inside the hub can pit the races. Finally, don't skip the alignment check after a curb strike, a slightly bent axle will chew through a set of tires in a single season.
Conclusion
Axle maintenance is unglamorous work, but it's what keeps a heavy smoker trailer rolling safely season after season. If you're upgrading your rig or adding a trailer to your catering operation, start with equipment built to handle the load. Blowin' Smoke Cookers offers heavy-duty steel reverse flow smokers and catering trailers, including the SNS 60 Smoker Cabinet Trailer and the SNS Deluxe 72 Catering Trailer Smoker, built with the durability that competition and catering demand. As an authorized distributor of Sling n Steel Custom Smokers and Meadow Creek BBQ Products, we back every rig with American-made quality. Get started with Blowin' Smoke Cookers and put a trailer under your smoker that's built to last.

Frequently Asked Questions
What is the 60/40 rule for trailer axles?
The 60/40 rule says 60 percent of your loaded trailer weight should sit in front of the axles and 40 percent behind. For a smoker trailer, that means your firebox, cabinet, and water tank placement matters as much as the pit itself. A front-heavy load adds tongue weight and helps the trailer track straight at highway speed. Too little tongue weight causes sway, which is dangerous on the road.
How often should I grease my trailer wheel bearings?
Grease trailer wheel bearings every 12 months or 12,000 miles, whichever comes first. If you tow through water or launch ramps, repack every 6 months. For a catering trailer used weekly during competition season, check grease color and level before every long haul. Dark or milky grease means water intrusion and the bearings need a full repack, not just a top-off.
What are the signs of a failing trailer axle?
Watch for uneven tire wear, a trailer that pulls to one side, grease leaking from the hub seal, or a wobble felt through the tow vehicle at highway speed. A bent axle often shows camber changes where the top of the tire leans in or out. If you see metal shavings in the grease or hear grinding from the hub, stop towing and inspect the axle before your next event.
Can I upgrade to stronger axles on my custom smoker trailer?
Yes, but the trailer frame and suspension must support the upgrade. Moving from a 3,500 lb axle to a 5,200 lb axle requires matching springs, hangers, and brakes, plus confirming the frame C-channel can handle the added load. Check the GVWR plate first. Many custom smoker trailers from builders like Sling n Steel are already spec'd with heavy-duty axles, so verify before spending money on parts you do not need.